Live Events
Data Reports
Time Gaps and Race Strategies
FIA GTC 2020
World Tour 1 - Sydney 🇦🇺
FIA GTC 2020 / World Tour 1 - Sydney 🇦🇺
Nations Cup
2020-02-16
Grand Final
Red Bull X2019 Competition
/
Dragon Trail - Seaside
30 Laps /
5x 2x /
RS-RM-RH
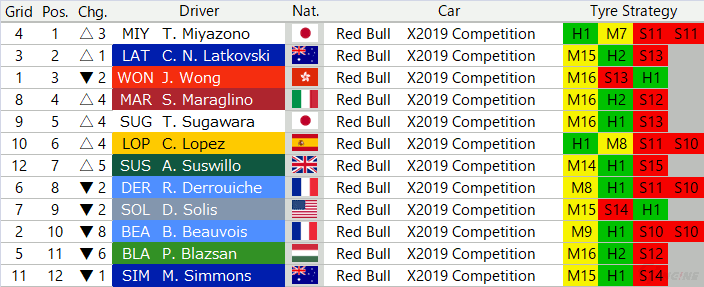
Drivers & Results
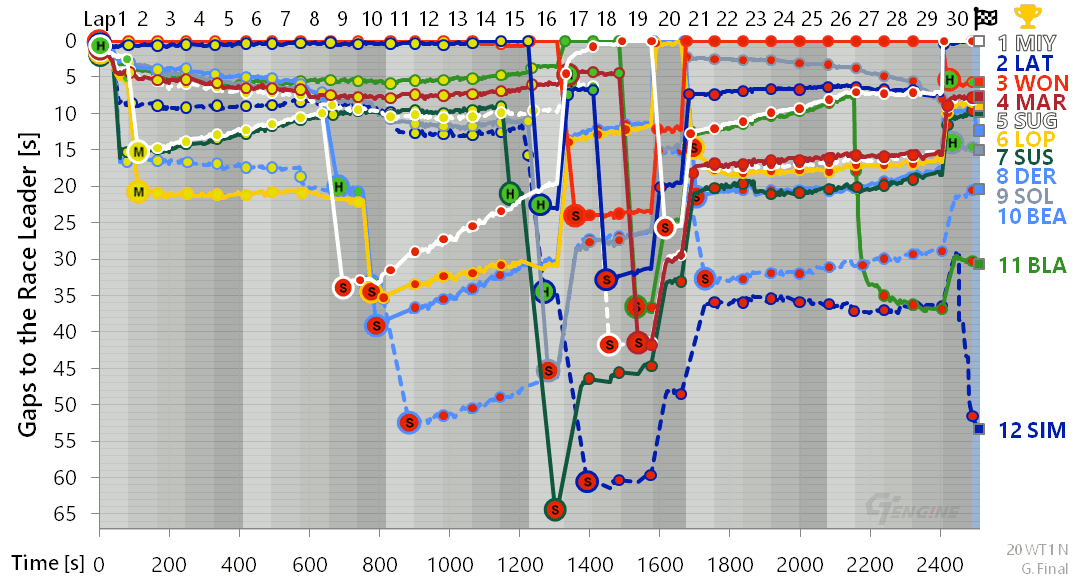
Time Gaps
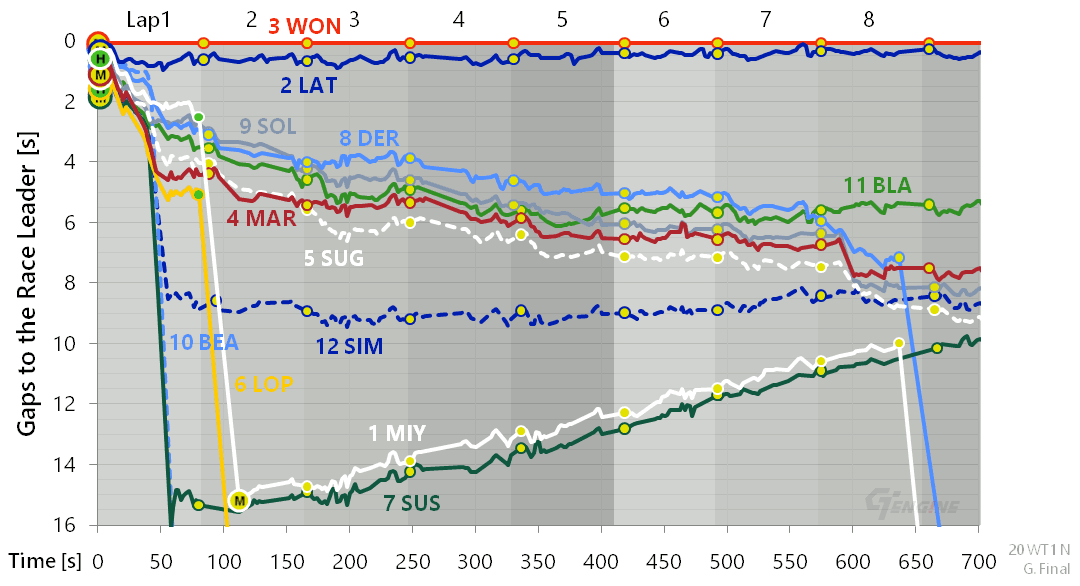
Time Gaps (Lap 1 – 8)
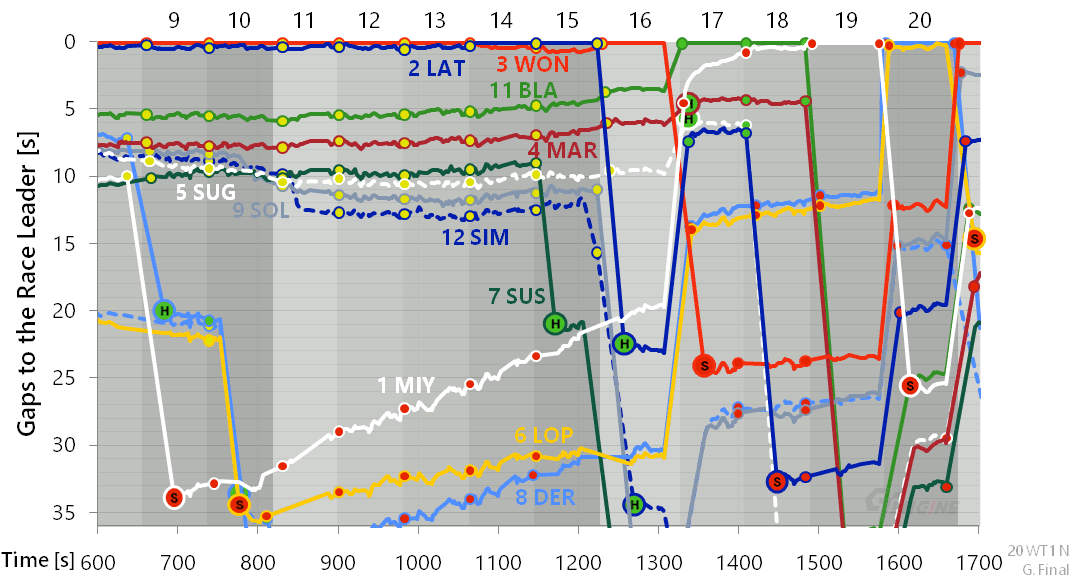
Time Gaps (Lap 9 – 20)
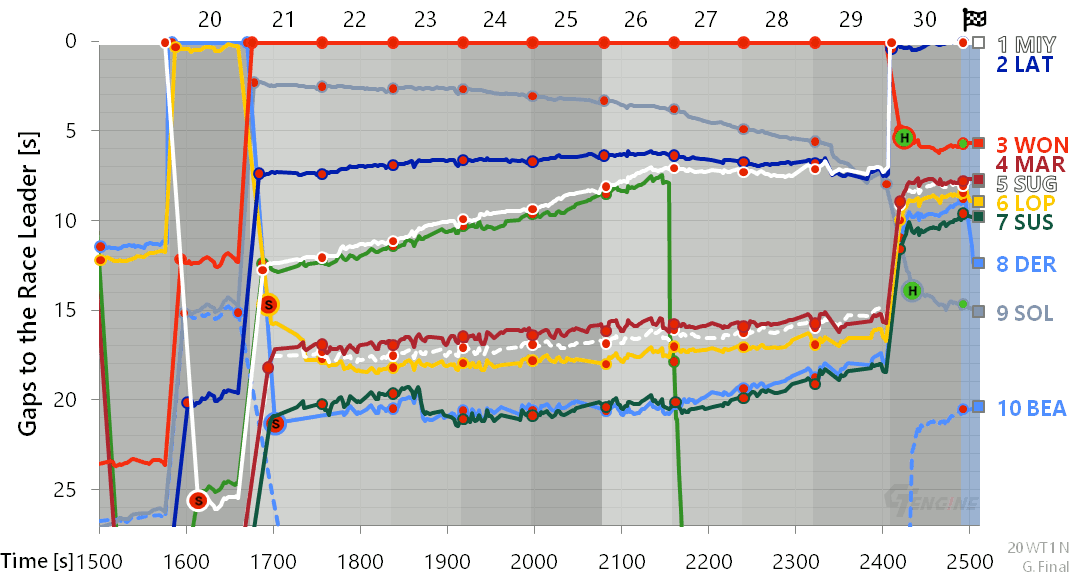
Time Gaps (Lap 20 – 30)
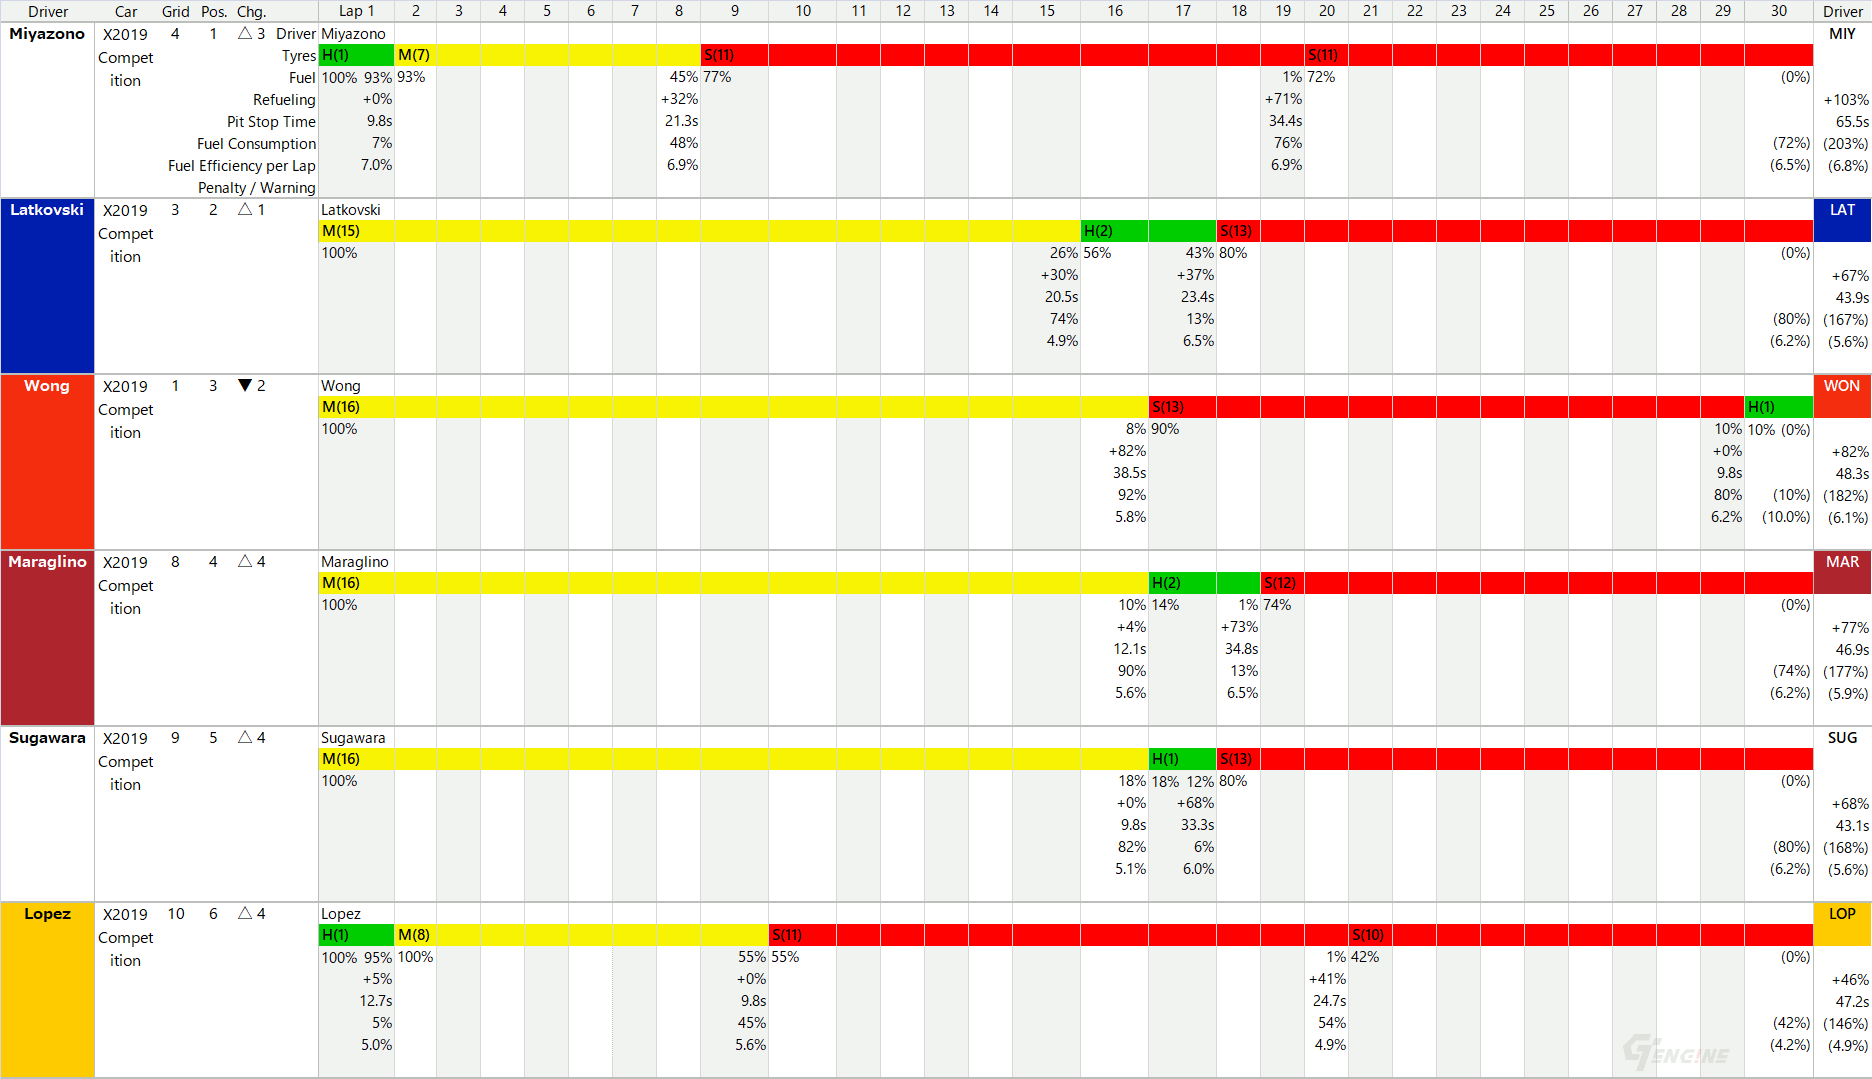
Race Strategies (P1 – 6)
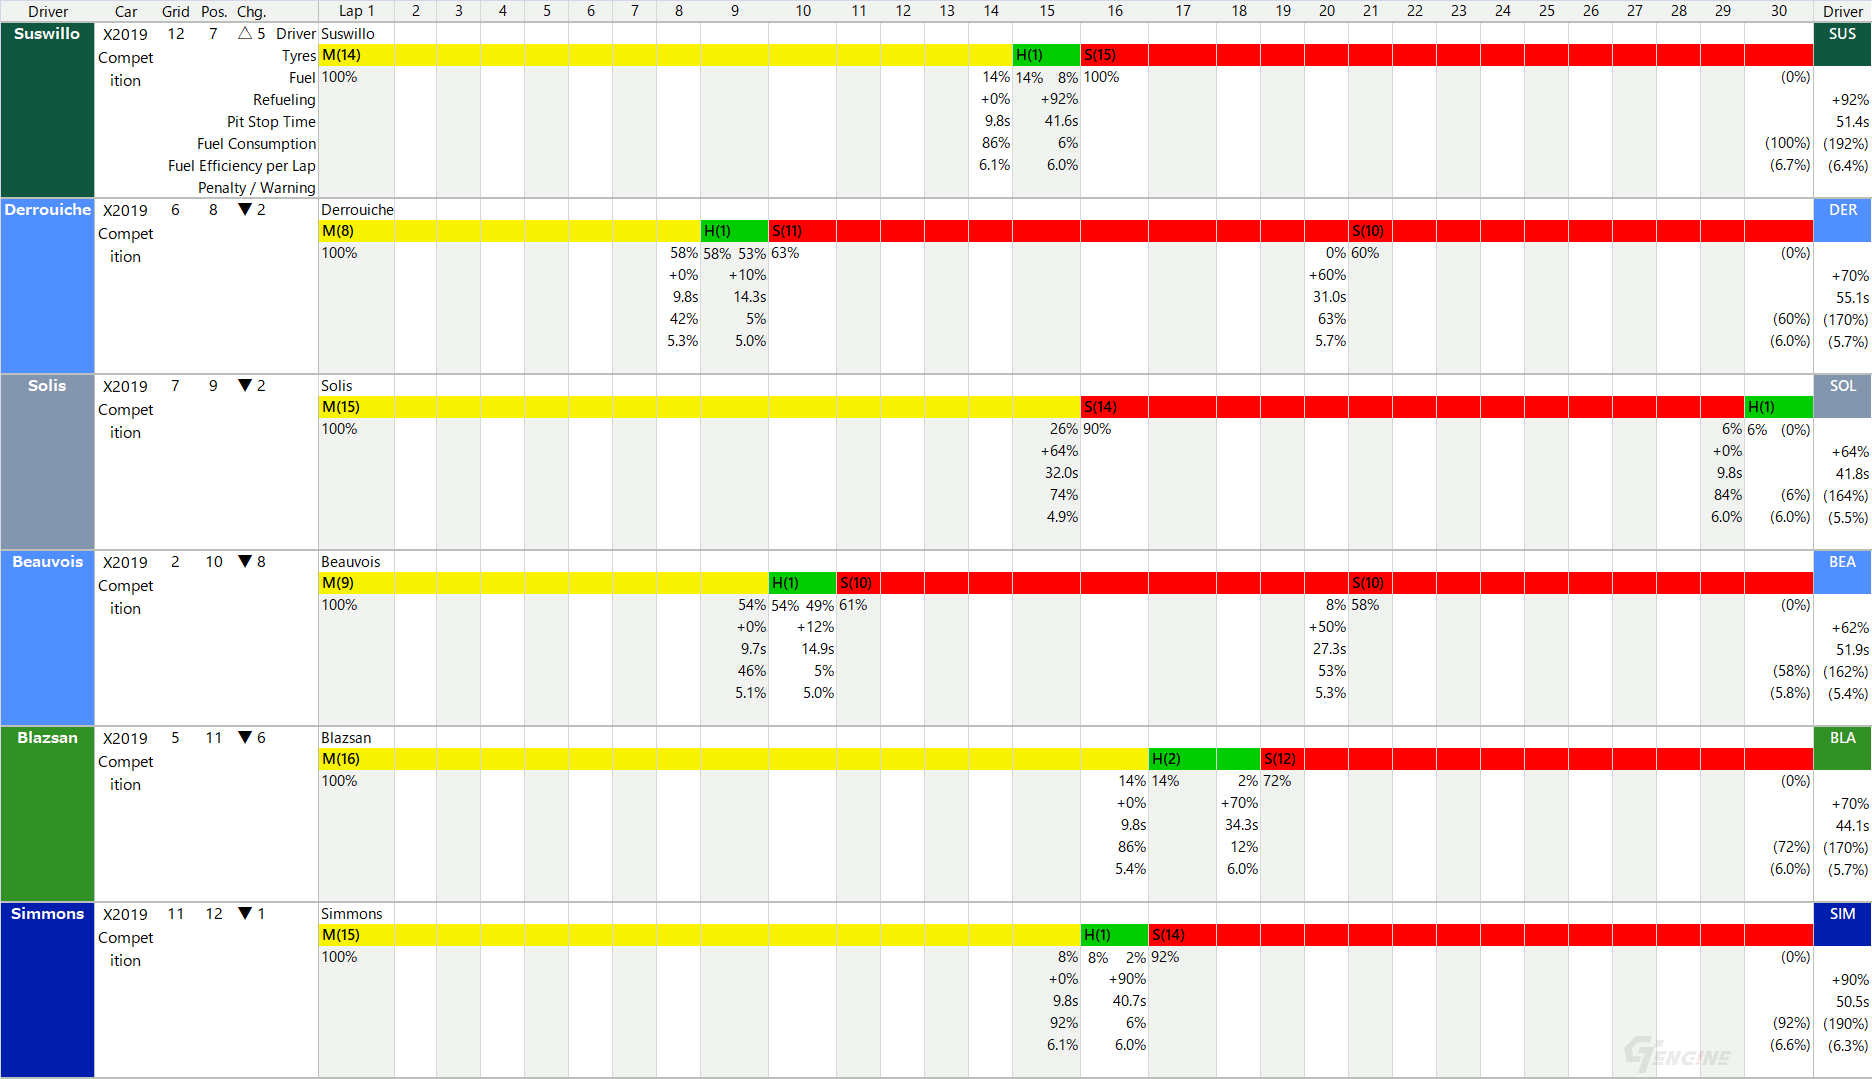
Race Strategies (P7 – 12)
Drivers & Results
Time Gaps
Time Gaps (Lap 1 – 8)
Time Gaps (Lap 9 – 20)
Time Gaps (Lap 20 – 30)
Race Strategies (P1 – 6)
Race Strategies (P7 – 12)
Drivers & Results
Time Gaps
Time Gaps (Lap 1 – 8)
Time Gaps (Lap 9 – 20)
Time Gaps (Lap 20 – 30)
Race Strategies (P1 – 6)
Race Strategies (P7 – 12)
Drivers & Results
Time Gaps
Time Gaps (Lap 1 – 8)
Time Gaps (Lap 9 – 20)
Time Gaps (Lap 20 – 30)
Race Strategies (P1 – 6)
Race Strategies (P7 – 12)
Drivers & Results
Time Gaps
Time Gaps (Lap 1 – 8)
Time Gaps (Lap 9 – 20)
Time Gaps (Lap 20 – 30)
Race Strategies (P1 – 6)
Race Strategies (P7 – 12)
Drivers & Results
Time Gaps
Time Gaps (Lap 1 – 8)
Time Gaps (Lap 9 – 20)
Time Gaps (Lap 20 – 30)
Race Strategies (P1 – 6)
Race Strategies (P7 – 12)
Strategy Classification
by Fuel and Soft compound usage
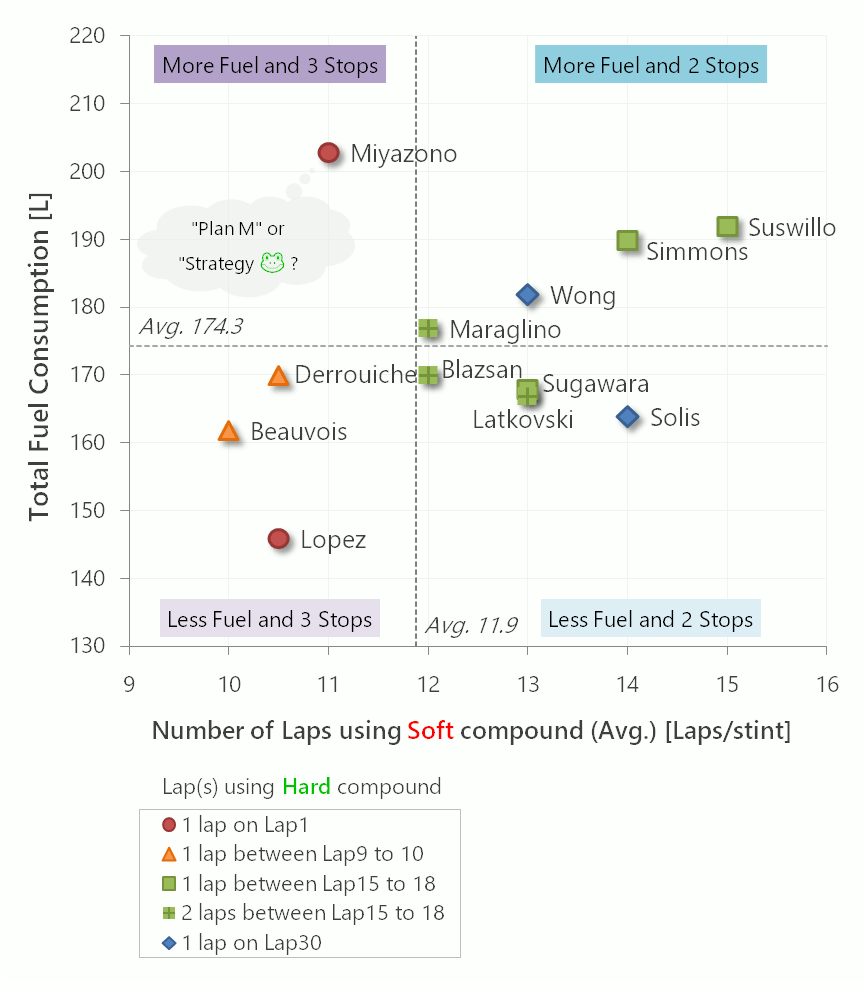
(It was assumed that all drivers had completely run out of fuel at the time of the goal.)